As I’ve shared on this blog several times, this past year I started Postcrossing, and it’s become a favourite hobby of mine. This post is about the postcards I sent and received from friends and family, and once again it was a great year.
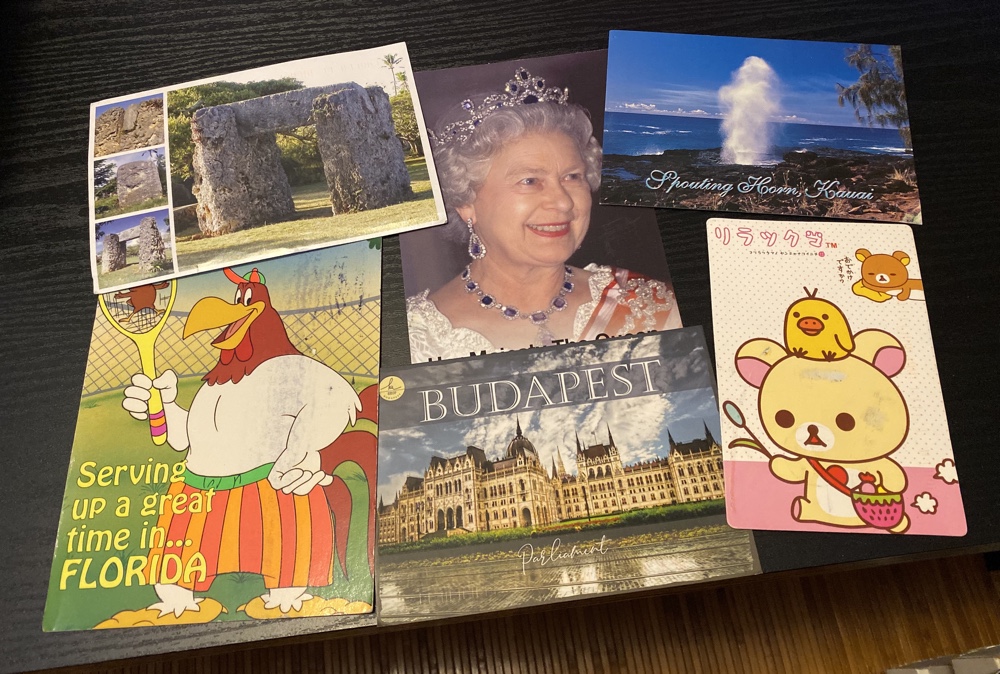
I received postcards from all over the world! Specifically from Scotland, England, Budapest, The Netherlands, Australia, Hawaii, Tonga, Norfolk Island, Denver, China, India and probably one or two other places I’ve forgotten. The above photo shows just a few of them, and as usual they ran the gamut from scenic to funny to saucy.
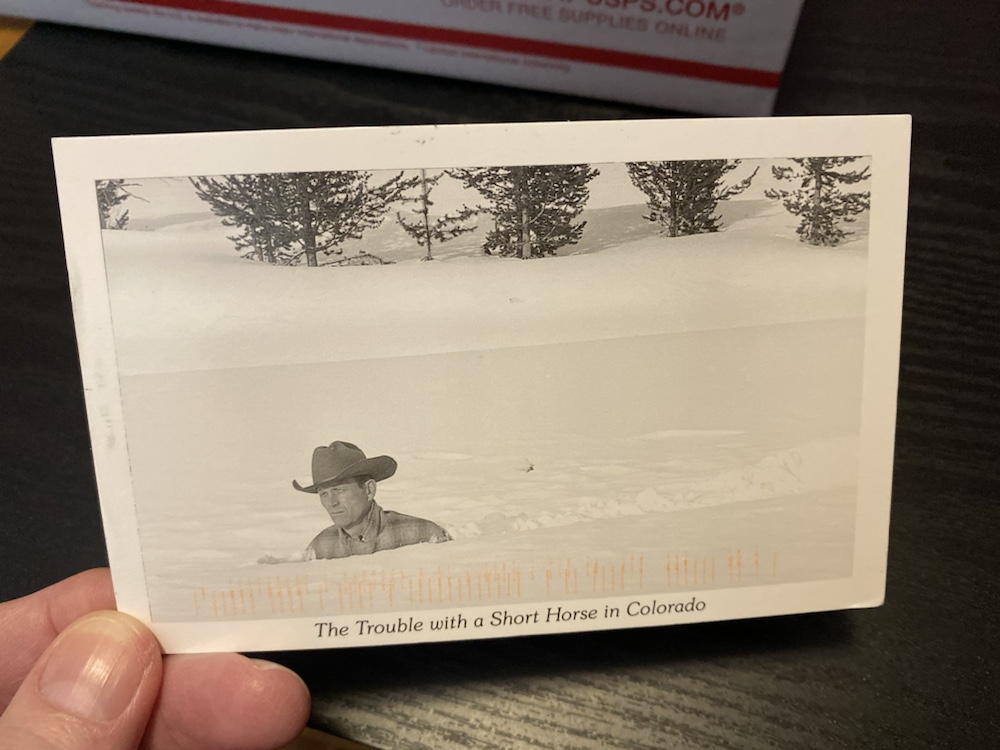
I love them all of course, but the above – sent by SMC from Colorado – gave me the absolute giggles. The cowboy just looks so serious 🙂
Naturally I sent myself/KLS a legion of cards (more than one per vacation day on average) and once again I relaxed in many a hotel room sketching, drawing or even painting on the back of such cards. Many of these illustrations went to one of you, but I made sure to send many home as well. Here’s a selection:
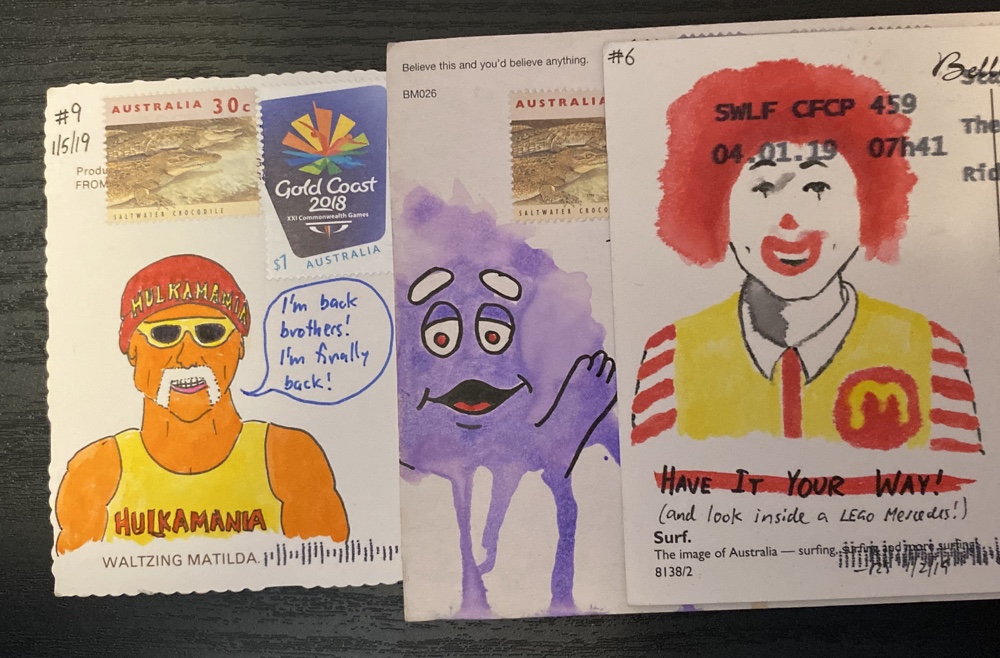
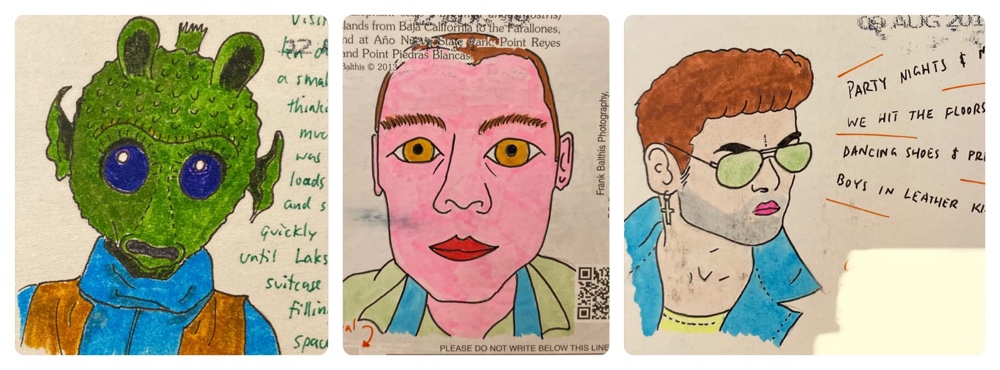
Australia was when I developed a few extra skills in watercolor, and I think you’ll agree my likenesses became photorealistic. The above examples – all sent to KLS from Oz – weren’t chosen randomly: for some reason each of these three are often repeated as topics of my postcard art. I’m sure many of you have received a Grimace by now?
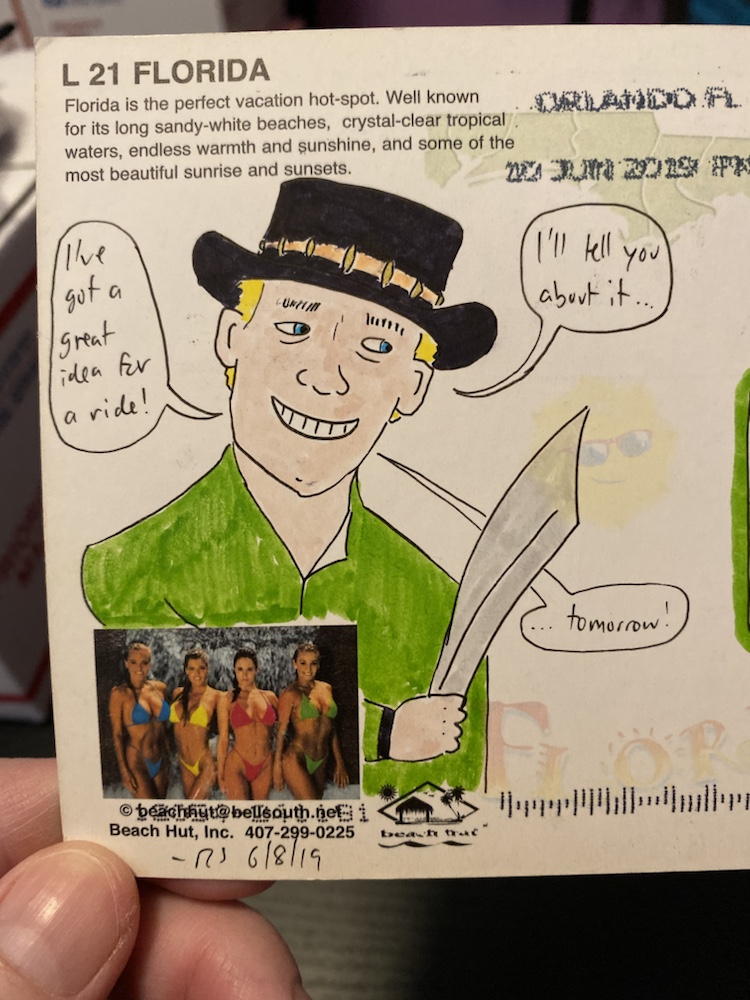
The above was drawn in Florida back in May, and on that trip I think I made a few strides toward more realistic renditions in this and a few (requests) I sent others. I also did a series (ten or so?) of Dobby the elf from Harry Potter cards that I sent from Florida. When I do such things I usually choose who gets which one randomly. I hope you liked your Dobby 🙂
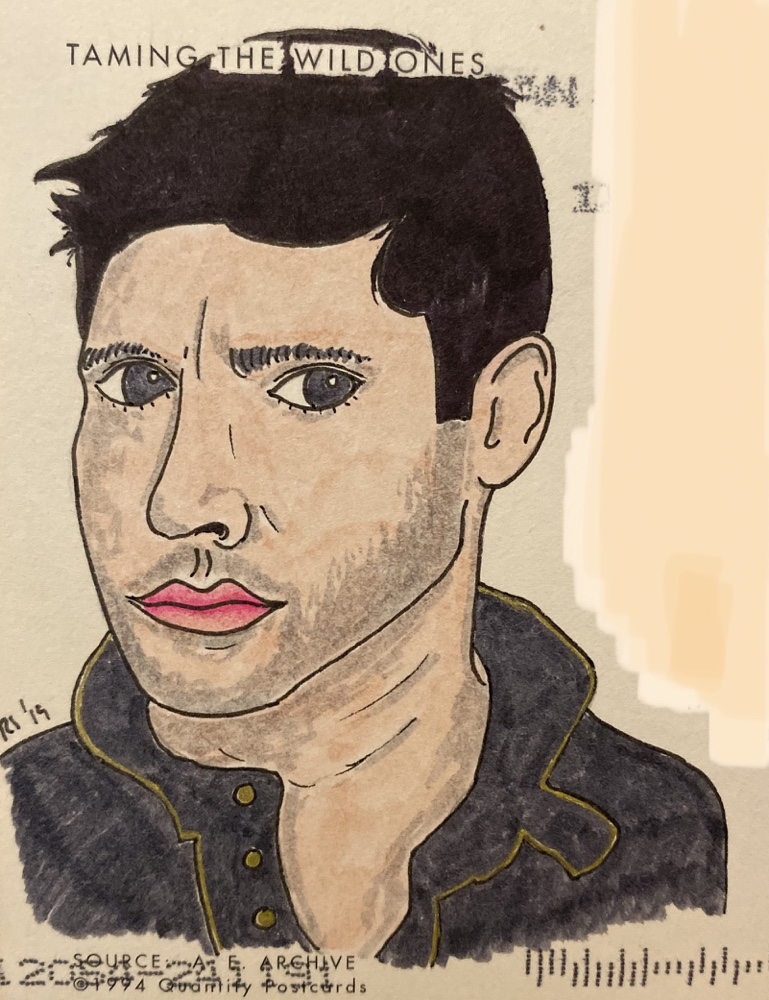
In California I dabbled with many more likenesses, and using watercolor pens even went so far as to attempt blending and shading! I even did matching portraits of the Supernatural boys that I feel cane out pretty good:
Alas my cards are in disarray, and the necessary task of sorting them so I can better prepare a post like this must wait until the new year. I’ve also got lots of them now – going back >25 years – and will have to upgrade my storage.
Very soon I’m off again to Australia and Japan. Needless to say I’ll be sending cards again so watch your mailboxes in the new year. And if you have any art requests – I’ll be using watercolors again – please let me know…