Category: Crafts

Bonsai!

I got this as a gift:

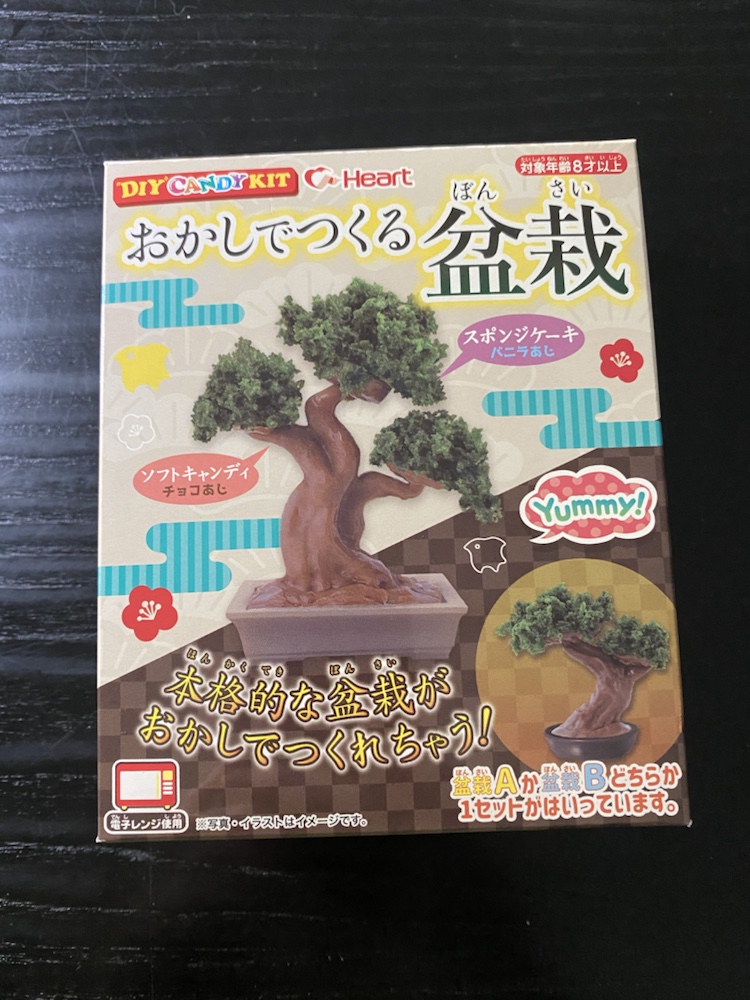
It’s a candy kit to make an edible bonsai! Start by kneading the chocolate caramel to make it soft:

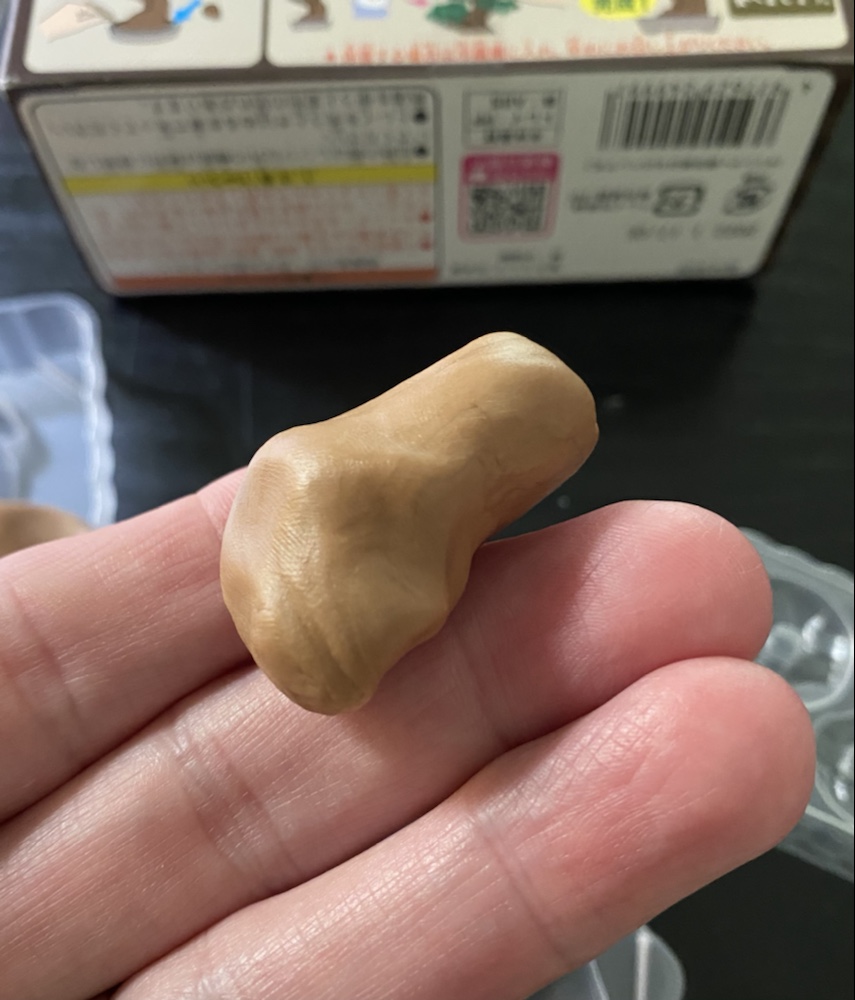
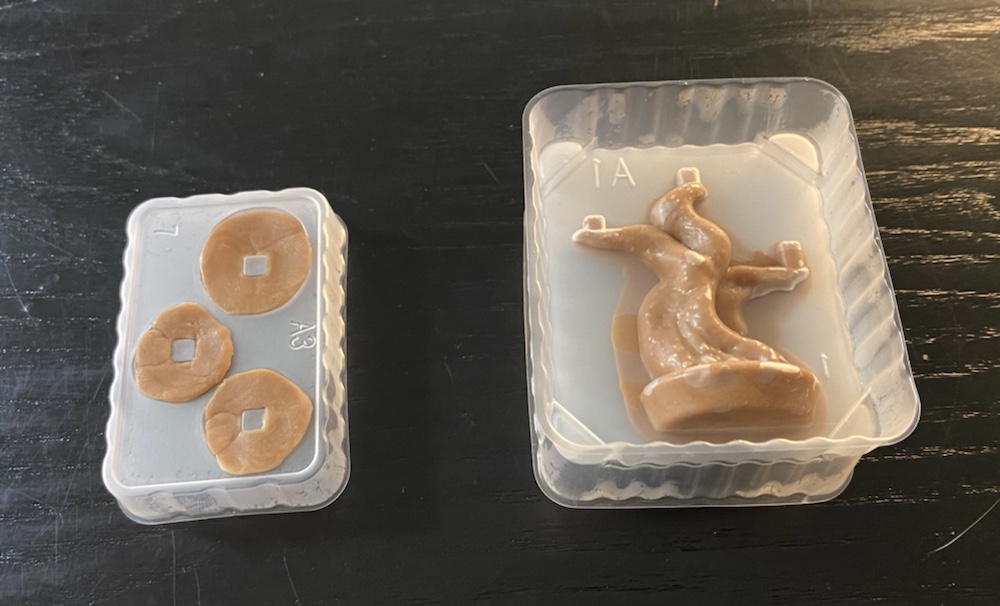
Gently fill the molds with the candy:

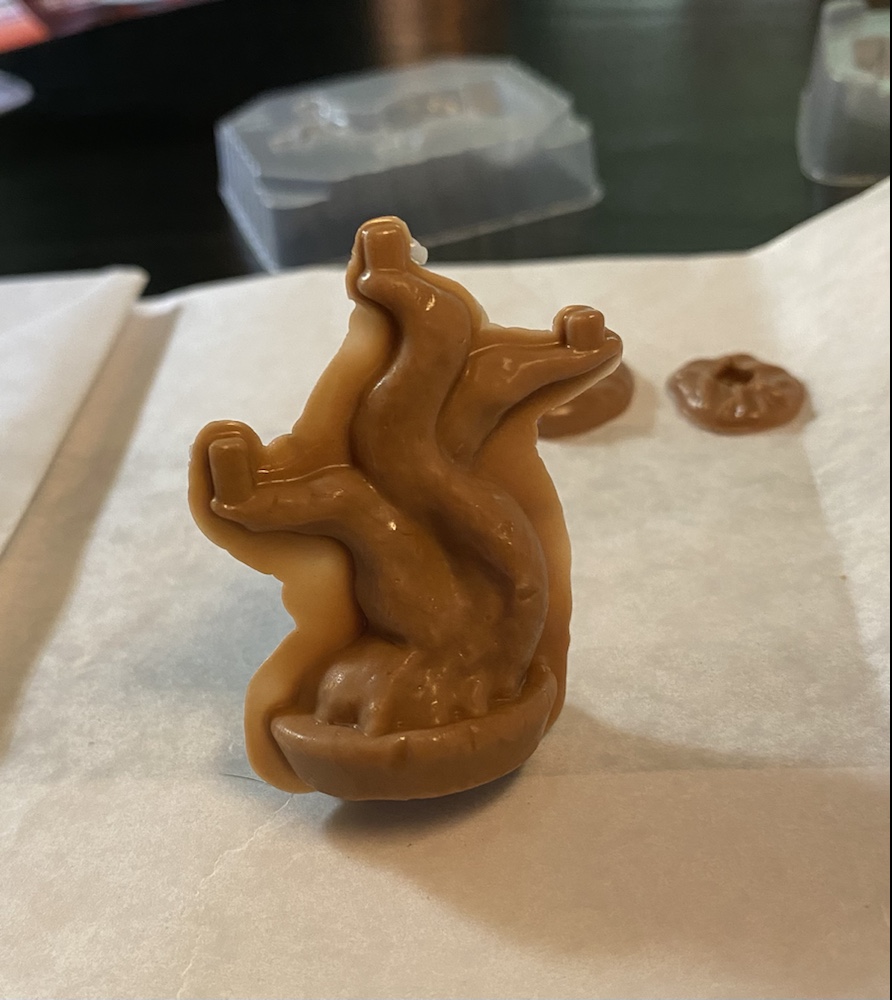
After a half hour in the freezer it had solidified:

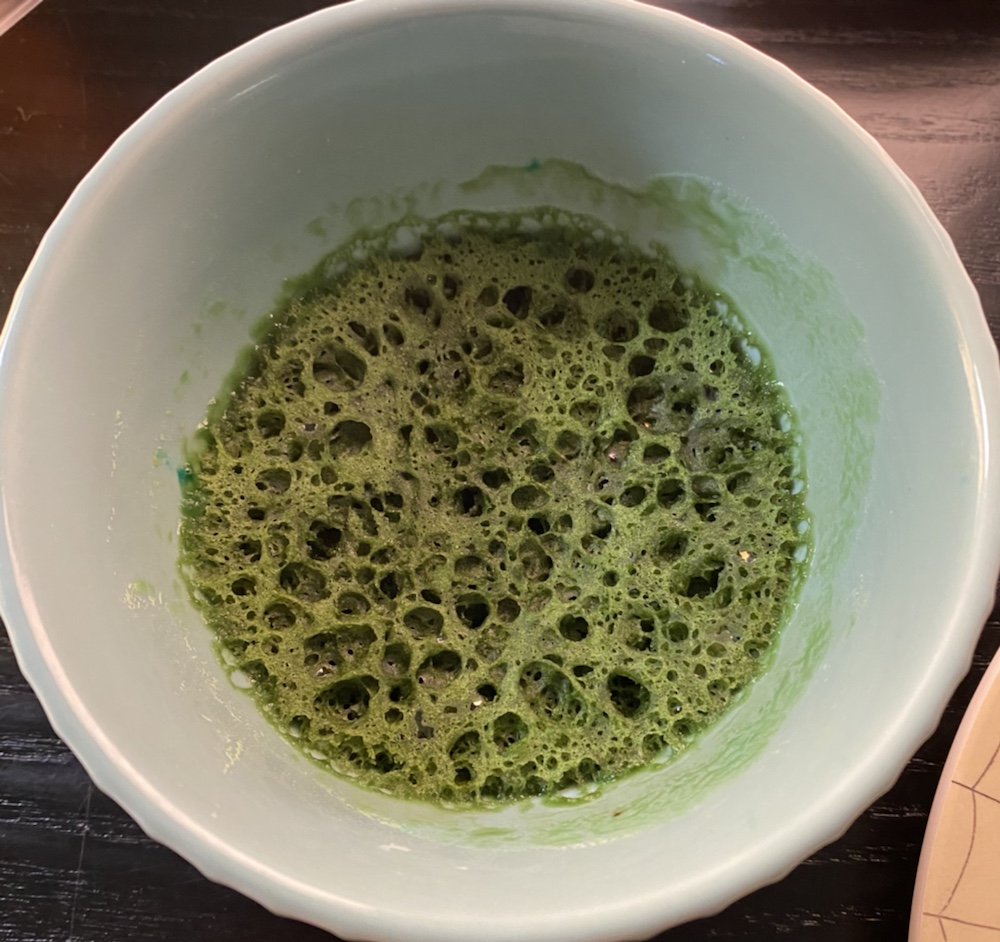
While I was trimming the flash Kristin was cooking a green sponge cake. It was as easy as powder and water mixed together and microwaved. It looked… unusual:

But stone the crows it looked convincing when broken apart and placed onto the branches:

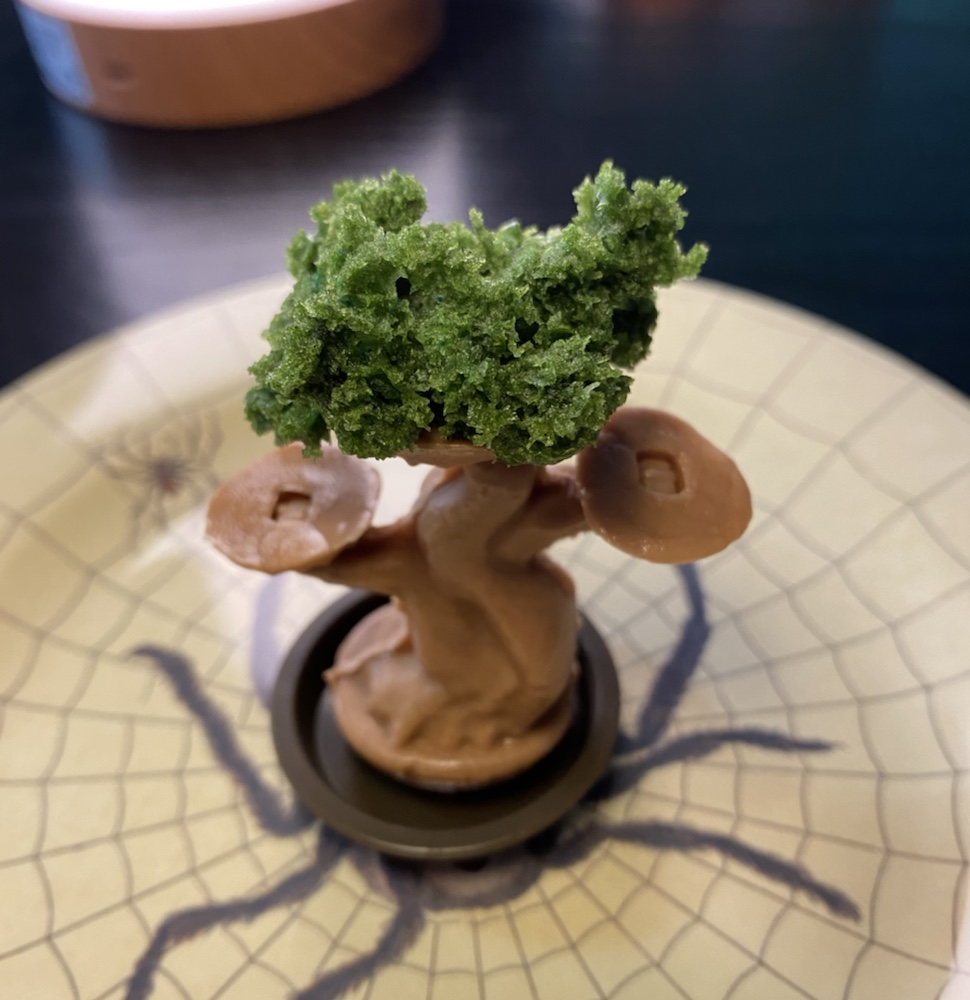
And here’s the finished product (which was about 2 inches tall):

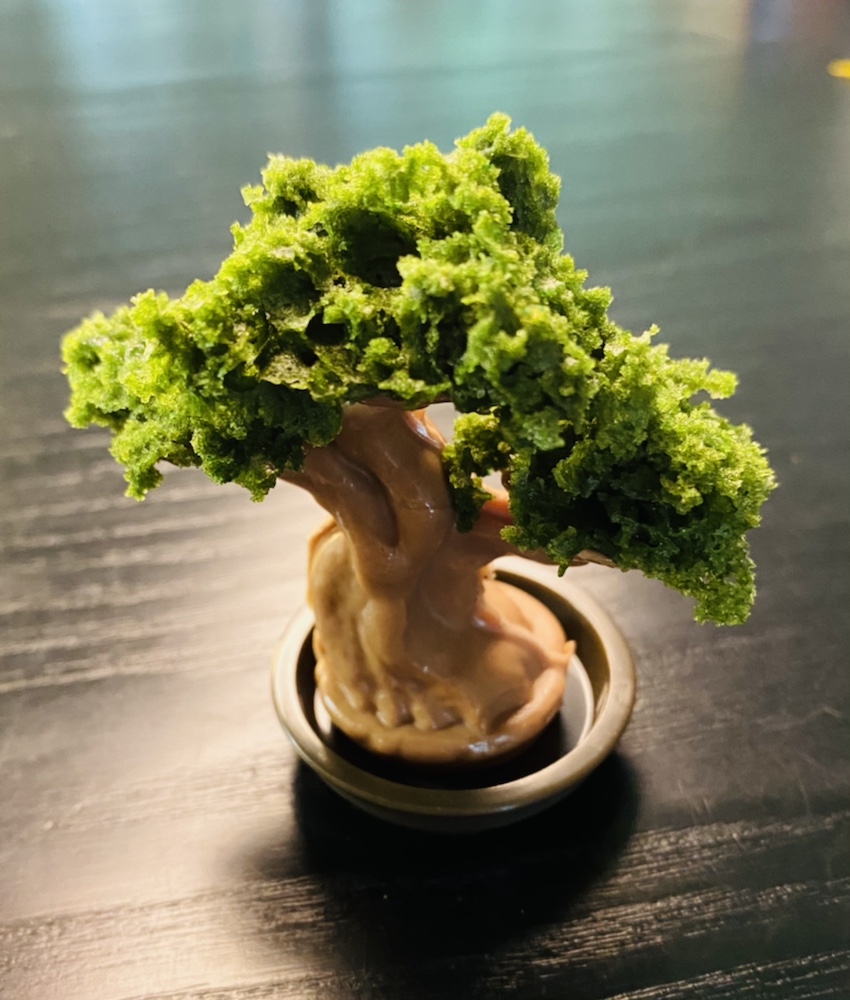
Looks good enough to eat doesn’t it?

And we did! It wasn’t bad at all; basically chocolate caramel mixed with cake. Easily one of the best candy food kits I’ve ever made – or eaten 🙂

Ramen 6: Finale!

And so we reach the final ramen post. But I’m not eating ramen today, I’m making it. Specifically, this:

It’s a plastic model kit of a ramen cup! This was made to commemorate 50 years of Cup Noodle and lest there be any doubt…

It’s not edible!

Here’s the contents:

As with all Bandai plastic kits the engineering is astonishing, and the pieces went together easily and almost seamlessly:

I particularly liked the lettering, which was made of plastic rather than used a sticker:

That’s not to say the kit had zero stickers. In fact it has a lot, but they’re easy to attach and make the finished product look incredibly lifelike:

Here’s a shot of the contents (pre-cooking, of course):

And here I faced a choice. Display it with the contents showing, or attach the lid? I chose the latter, and the contents of my cup will therefore be sealed away forever.

Here’s a shot showing scale next to a toy car I just happened to have:

It’s a fantastic kit, and I’ll be keeping it on permanent display 🙂

Let’s Go Sith!

I made this:

It’s one of many new mosaic kits that LEGO has released. You can assemble one of three images, and I chose Darth Maul.

The instructions say to assemble the mosaic separately as nine tiled pieces with 256 studs apiece, but since this would require having all 12 colours going simultaneously I instead chose to do it by colour.

This way I saw it slowly come together as I worked, and I think I felt this method is much quicker than what the instructions suggest.

To be honest it wasn’t exactly fun, especially when I got to black. I had to place 877 of these identical black studs one at a time! My fingertips were aching when I was done!

All told it took a few hours over two days. Given the tedium of assembly and the (presumed) greater tedium of dismantling it I very much doubt I’ll ever make the other two designs!

It’s bigger and heavier than I expected (but does come with brackets for wall mounting) but looks good from a distance. It would have looked better using the smaller flat pieces rather than studs, but I can see why they avoided that since it would have made disassembly extremely difficult.

Overall it’s more of a curiosity that a success. I don’t think I’ll be buying any more of these, but it does make me more interested in designing a mosaic of my own…