I like postage stamps. Always have, always will. I still buy them a lot, especially when I’m in Australia. They are also one of the reasons I love sending postcards, and I enjoy sending (or receiving!) cards with exotic or particularly pretty stamps on them. I wonder if any of my recipients notice?
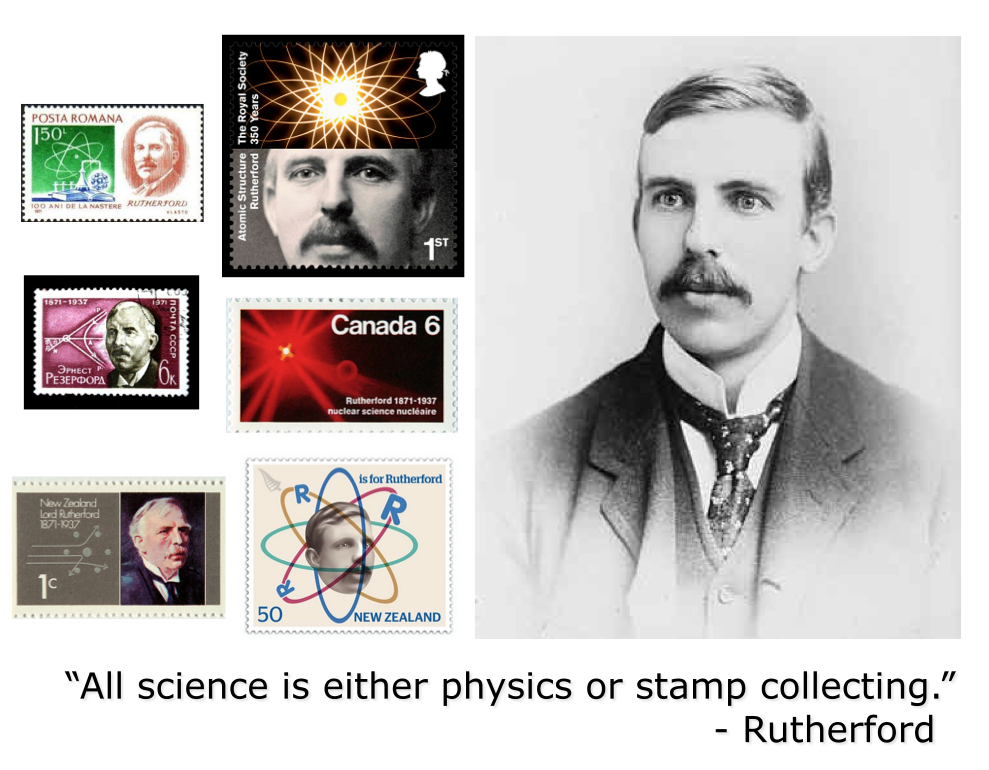
That’s a screen grab from yesterdays lecture, which was about the atomic structure. Rutherford is a real character, and I’ve always found it humorous that he’s been on so many postage stamps considering his (in)famous quote about science. Other slides in yesterdays lecture were peppered with stamps as well, and it’s actually quite easy to find stamps to use as illustrations in physics lectures.
In searching for such examples, I couldn’t help but notice that the masters of honoring their scientists on postage stamps are unquestionably the Germans. There are many and varied examples of beautiful stamps showcasing very famous scientists from German history.
Take for example this one:

What a beautiful stamp! Hertz discovered electromagnetic waves, and this stamp displays the oscillations of the electric force due to a magnetic dipole (ie. EM waves) in the background. I love that the lines are superimposed over Hertz’s portrait, as if to put the science before the man.
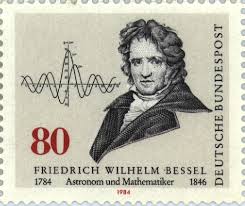
This stamp of Bessel is magnificent! The portrait is wonderful, and the fact the stamp prominently displays a plot of a ‘Bessel function’ (important mathematical tools required to solve complex partial differential equations) is just icing on the cake! How I’d love to stick this on a postcard!
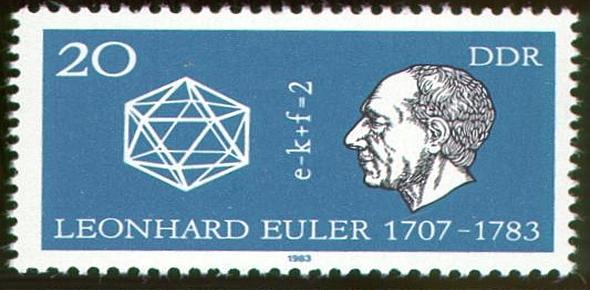
Here are some other wonderful examples of Germany’s science stamps:

That last one (Gauss) is sublime! Gauss is one of the titans of mathematics, and is one of the few men to have multiple identities or equations named after him. One may imagine that they would have shown a Gaussian distribution on the stamp, but whoever designed it chose the 17-sided polygon that he created using compass and straightedge when he was only 19. I love it!
Lovely stamps these all are. The woodcut portraits add to the appeal, and the fact the stamps embrace the science only make them more appealing.
Of course Germany isn’t alone in recognizing science in their stamps. Here are a few other wonderful examples I found (and in some cases have inserted into lectures):
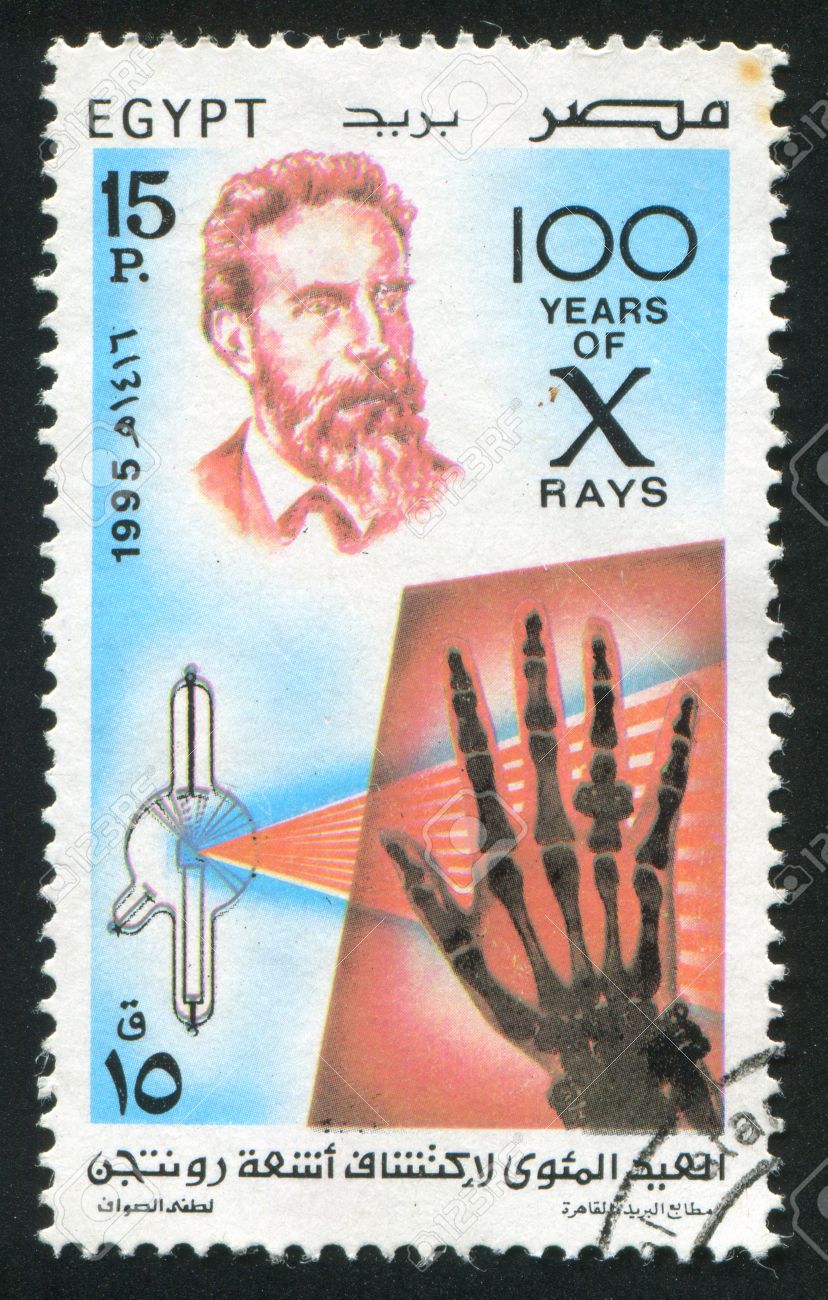
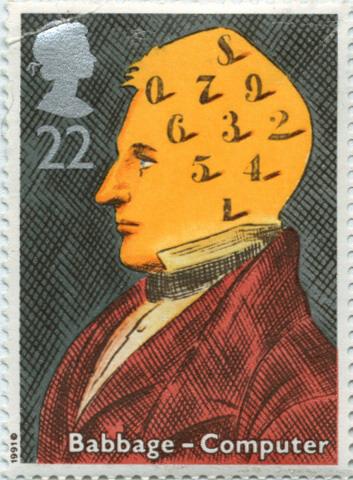
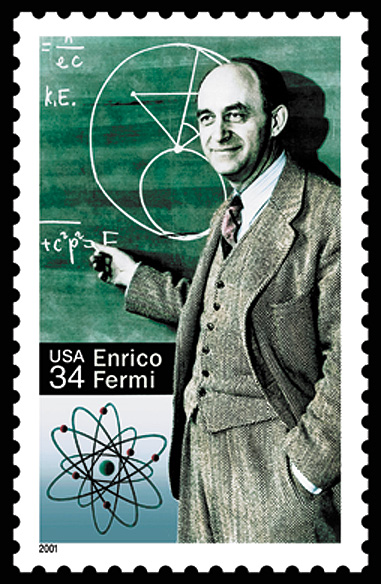
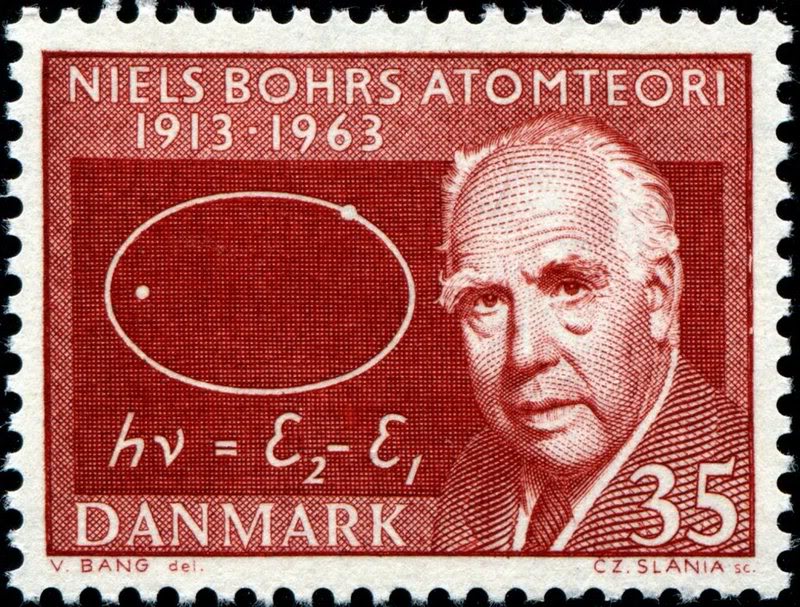

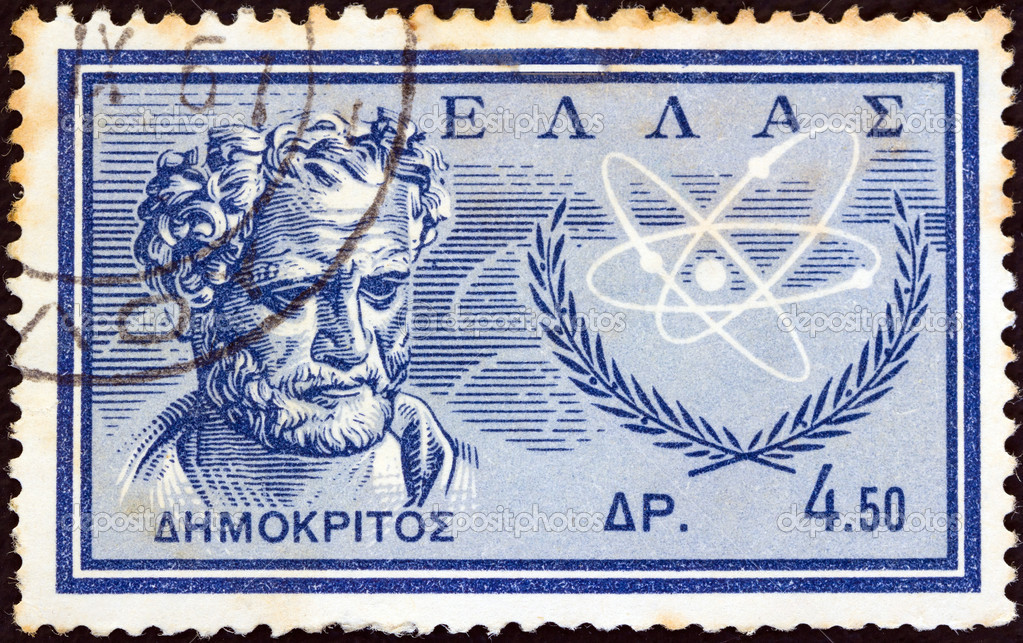
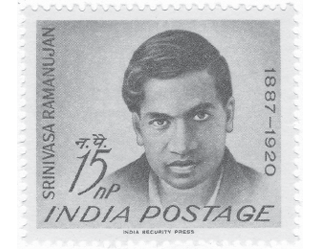
From the top, we have Roentgen (x-ray), Babbage (computers), Fermi (atomic physics), Bohr (atomic structure), Mendelev (chemistry), Democritus (coined the word ‘atom’ in 450BC) and Ramanujan (Indian mathematics prodigy). I love them all. I wish I had them all in a big frame. I’d display it proudly in my office.
You’re all wondering “What about Einstein?” He’s on more stamps than any other scientist, and they run the entire range of design and theme, since his fame moved into celebrity as well. I think this is perhaps my favourite Einstein stamp of all those I found:
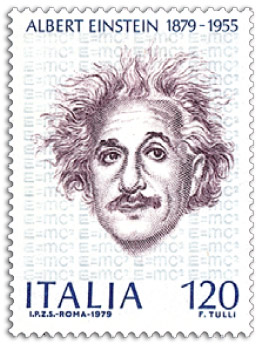
It’s simple, subtle (note the background) and a lovely portrait of Einstein when he wasn’t much older than when he presented his most important theories. This stamp would look beautiful on the back of a postcard of a surfing koala or kangaroo drinking a beer 😉